A couple of years ago, an acquaintance of mine put up on Facebook a question about “As a firearms/self-defense trainer who teaches courses, if someone came to you knowing (for certain) that they’d have to use their firearm as a lethal-force response to a self-defense threat tomorrow, would you teach them any differently?”
I said: “Of course I would!”
Whereupon I got jumped all over by lots of people who claimed that as firearms instructors, their classes were all completely focused on teaching REAL self-defense, and that if I had to change my class, it was an indicator that my class just wasn’t very good.
Which just goes to show that like any other group of people, “firearms instructors” contains all kinds, a significant proportion of which are idiots who have no idea what they are talking about.
At the start of 2016, I posted an article about one of the things I was going to try to do to get better at shooting throughout the year, which was attempt to dryfire every day. While I didn’t manage to meet my goal of dryfiring every day, I did certainly dryfire much more often than I had in the past, and it made a difference to my shooting. (I made excuses for myself on some days later in the year, rationalizing not putting in the work. The excuses weren’t valid, and it isn’t like the extra 3 minutes I got instead of practicing ended up being useful to me. One of my goals this year is to not make excuses for not doing the work.)
People who actually want to get better at shooting, AND have the self-discipline to put in the work, find pretty quickly that if they never shoot any diagnostic drills then they have no idea what they are good or bad at, which means they don’t really know what they should be working on.
It is really temping to just work on the things that you think are “fun” — but chances are, those things are both easy and also are thingsyou are already good at. Sure, doing that (and getting even better) isn’t a bad thing–but if that is all you do, you simply aren’t going to get much better overall. Continue reading →
So, being out at the range the other day, I observed yet another set of range behaviors that again defied my understanding. I don’t get how people can commit such egregious safety fails without any understanding of why it is a problem.
And while pointing it out in articles time and again doesn’t seem to be helping, I thought I’d write about it again because there ALSO seems to be a lacking of understanding of how range rules are ALSO things you have to pay attention to regarding safety and range procedures. Continue reading →
I was recently in a firearms class when the instructor, in the middle of demonstrating a drill involving reloads with a semi-auto pistol, suddenly dropped his gun, dropped to a knee, pulled a j-frame revolver out of an ankle holster, and engaged the target. When he stood up he grinned and said “And when you want a REALLY FAST reload, you simply grab another gun.”
That got me thinking, because up until that point in time I had simply gone along with the assumption: New Gun = Faster. Don’t have to drop the mag and find a new one and insert the new one and then shoot–just hit that New York Reload (for those new to firearms, a “New York Reload” is simply pulling another gun) and life is good.
Of course, it could be better.
But….is that really true? Are New York reloads (NYR) actually faster in this day and age when most people carry semi-auto pistols? Obviously, it is true for revolvers being loaded with loose rounds (and probably still true for most people even with speedloaders or moonclips, Jerry Miculek notwithstanding)….but this seems to be a concept taken as “standard truth” by most people for all types of carry, including semi-auto pistols.
Watching the instructor pull his backup gun (BUG), I really wondered about it—because here was a skilled, experienced instructor whom I respected, and it took probably a little over 2 seconds from shot to shot between the old gun and the new gun–and he knew when the old gun was going to go dry so it wasn’t a surprise. Sure, plenty of people don’t have 2-second reloads. But…most people don’t have 2-second draws from BUG positions, either…
So are NYRs normally faster than standard reloads?
I thought I’d find out, or at least get one comparative data set. In my case, instead of drawing a small backup gun from a ankle holster or some other place equally difficult to reach, I used a G19 from an IWB holster carried strong side behind the hip as the BUG. My normal carry is a G17 in an AIWB holster, so I went from my normal carry gun as the primary, to a “BUG” that was a common primary carry pistol using a normal primary draw type for most people who carry.
In other words, I’m giving the NYR the maximum chance to be fast, by making it an easy gun to draw and shoot, and doing so from the place where most people carry their primary.
Contrasting this, I’ll be performing a normal reload-to-shot from my standard extra magazine carry position.
Here’s what happened:
There just doesn’t seem to be that much difference in time. If I was drawing a j-frame from an ankle holster, it would have been even slower.
…I’m just not seeing much in the way of saved time here, using a New York reload.
Now, no matter what else is true, there are some useful things specific to each type of “reload”:
New York Reload Advantages:
If your primary has an unfixable malfunction (at least, unfixable within a useful time frame) the NYR is obviously going to work best.
If your primary is taken, lost, or unavailable due to position, then the NYR is obviously going to work best.
Standard Reload Advantages:
You aren’t reloading to a smaller gun that is harder to shoot well.
You are reloading to another full magazine of ammunition, instead of a 5-shot snubbie or something similar. (If you shot so much that the gun went empty once, the idea of now only having 5 rounds doesn’t sound good…)
You don’t have to reach to draw from a non-primary position. Example: You can’t draw from an ankle holster if you are trying to run for cover. Or run anywhere. Many backup guns are holstered in unobtrusive (meaning: slower to draw from and harder to get to) positions, making them harder (and slower) to access.
So ignoring the time differences, there are some potential cases when the New York Reload is the only one that will get you a working gun. In others, the standard reload is the only one that will make it happen.
Best choice? Obviously having both an extra magazine and a backup gun to cover all the bases.
That being said–there just doesn’t seem to be much of a time difference between the two “reloads” when going from shot to shot. And in my case, my standard reloads are actually probably going to be faster than any backup gun that I’d actually carry.*
*Obviously this sample is one case, based on one set of guns/holsters, done by one person. If your reloads suck worse than mine, maybe the BUG will be faster. If you can’t hit anything at speed with a tiny gun past 3 yards, maybe the standard reload will be best for you. But….that difference isn’t a function of the method, that’s a function of shooter skill. From the viewpoint of method, there just doesn’t seem to be as much of a time difference as many people might think—especially if someone is drawing a tiny BUG from deep cover.
There are a number of different ways to perform a reload, and a number of different reload “types” that people perform. Administrative reloads, speed reloads, emergency reloads, tactical reloads, reload-with-retention, slide-closed emergency reloads…
…in the end, they are all about getting ammo back in the gun and being able to shoot it again as fast as possible. (Well, except for the admin reload. We are going to ignore that, however.)
There are already a number of videos out there that show how to perform various types of reloads, and we don’t need another one. Instead, as is normal in this series, this video will talk about some of the most common errors people commit in their reloads, and show you how to fix them.
Don’t forget to keep your finger pinned to the frame or slide while performing your reload, and don’t put it back into the trigger guard until you have the gun pointing on target and you plan to fire. Even if you screw everything else up, get the safety part correct.
I recently participated in a discussion regarding gun defenses, which started from a video by Polenar Tactical regarding how little it takes to cause a handgun’s slide to not function correctly. It surprised me that many people didn’t know how easy it is to cause the slide of a semi-auto to not cycle correctly. Merely putting a thumb on the rear of the slide is enough to stop the slide, and no, it doesn’t hurt your hand at all.
It led into a discussion about (after off-lining the gun) what to do when defending against a firearm: perform a disarm at distance, use the body to control the gun, or enter while jamming. For awhile at the beginning, there was some discussion as we all attempted to make sure we understood exactly what the other person meant by phrases like “jam the gun” or “use the body to control the gun.” (Which was good, actually, because sometimes in discussions like that people don’t bother to make sure they are all talking about the same thing, and it goes downhill from there.)
It caught my attention a bit during the discussion about whether or not it was a good idea to close with the attacker and jam the gun, primarily because in my experience (which is limited to observations of training and force-on-force evolutions, not people actually being shot because having a large amount of experience at this is something I don’t want to gather) whether or not the defender should close is often highly based on the relative sizes of the attacker and defender.
Another way of saying that is if the attacker is bigger than you, closing with him isn’t a good idea unless you have no other choice.
Now–opinions vary on this. Other people in the discussion had closing/jamming being their primary reaction. (My response was “I bet you are a pretty big guy” because that would be an excellent choice for a big guy, though not necessarily for others.)
Here’s a little video showing the various conceptual choices you have regarding gun defenses. In general, you can offline the gun and move outside, move inside, or you can offline the gun upward. After that, you can perform a disarm/attack at distance, you can use your body to control the gun at distance, or you can close/jam the attacker. Effectively, pretty much every gun defense (that doesn’t include weapons) is one of those things.
The video doesn’t include what to do after those points, and it definitely doesn’t include information about how to offline the gun in the first place. You want to know how to get the attacker to miss the fact that you are removing yourself from harm’s way? How to mis-align the attacker’s weapon so you don’t get shot? Take a class. Making it clear how to do that in public seems a great way to educate attackers, and I don’t really see a need for that.
The point of the video is to understand the common choices of entry, and then the pros and cons of the various followup ideas that are possible from that point–and there are certainly strengths and weaknesses for each.
In the video, I didn’t discuss at all what you can do with weapons of your own–such as having a gun and the ability to draw it quickly one handed for close-range shooting or having a quick-access blade for close-quarter work–because that changes things significantly. It doesn’t make “not getting shot immediately” any easier, nor does it automatically make you safe or let you “win” if you think about it in that fashion.
But it does give you more choices. For example, if you are moving in close to jam the gun, stopping the other person quickly isn’t easy to do, and you BOTH are effectively equal in terms of capabilities at that range, depending on your relative size. If, however, you have a knife in hand, ANY strike you do can be significant. (That isn’t the same as debilitating, though.) Similarly, if you are able to jam the other person and simultaneously draw your own firearm and place shots into the attacker, that’s a big deal.
In those last two cases, size isn’t nearly as important a factor as it would be if you didn’t have a self-defense tool (read: weapon) available to you.
There’s a lot of gun disarm/gun defense videos out there. Many are pretty cool looking, some have solid technique. Unfortunately, many are also pure nonsense in terms of actual effectiveness, much of which is because the technique itself is Hollywood-style crap that looks good but only works against someone who isn’t actually resisting.
When looking at gun defenses, bear in mind:
If the offline doesn’t work, you are dead. It has to work against a resisting attacker. The cool-looking gun strip at the end means nothing if you’ve already been shot in the face getting your hands on the gun.
If the technique is a distance disarm using arm strength that won’t work against someone who resists and can move, then it isn’t a good technique.
If the technique is a body-on-body gun jam that requires you to incapacitate the attacker while jamming the gun, then body size WILL make a difference unless you are lucky or catch the opponent by surprise. (Because after that point in time your attacker has just as much chanceto making a debilitating strike as you do at that range.)
If the guy teaching the technique won’t ever show you what it looks like versus an active attacker using a gas AirSoft gun and face/throat protection (or something similar, even a laser designator), he doesn’t think it’s any good either.
Different techniques are most effective for different people. All techniques will not work equally for everyone. Make sure you understand which ones fit your strengths best–and which ones you only try if you HAVE to do so.
Take this picture shown below, for example. This is a promo picture from a certain training school/organization specifically for a gun defense seminar–and yet, looking at it (as a static picture, maybe a video would be better but I doubt it) it seems to violate several important things. The direction of the gun is not controlled–the attacker can turn their wrist fairly easily as you can’t clamp very hard that way. If the elbow strike by the defender is not significant, then the attacker is not particularly off-balance and the situation will effectively be on an even footing–except he has a gun that you don’t control, and he does.
What is stopping the attacker from simply turning his hand and shooting you? Even by mistake?
I realize that the picture makes it look as it the attackers are off-balance, but that is completely a function of the elbow strike. If the elbow strike doesn’t work, is blocked, jammed, or off-target, the off-balance will not happen from that technique. Stepping in, binding the arm but not the weapon, and relying on a striking technique to stop the attacker sufficiently so that even by mistake he doesn’t turn the gun into you and fire is just NOT A GOOD IDEA.
How about this picture?
Yes, because gun attacks look exactly like this.
Oddly enough, even though this picture by itself contains much contrived “let’s make it easy on the instructor by being completely non-realistic” derp, the YouTube video it comes from is actually not bad, and is one of the few I’ve seen that does a good job of describing how to make an upward offline technique work. However, it still is a low-percentage technique for offlining in the first place–even though it LOOKS like it works really well in the video, it only looks good because the gun is pointed so high in the first place that merely hunching the head down is sufficient to take it offline, and apparently no attacker ever pulls the gun downward by jerking the trigger. (I’ll also note that the technique as taught piece-by-piece isn’t the technique the instructor uses at speed.)
Practicing versus a partner who is just holding the gun out is necessary in the beginning, as you need to practice the specifics of the technique in the beginning. However, once that is solid, a GOOD instructor will have the students start training with increasing levels of resistance–and perhaps set up verbal interactions also. However, since many schools/instructors don’t do this, many students are convinced that their techniques will work even if they have been taught poor technique. As I said, if the guy teaching the technique won’t ever demonstrate it in a force-on-force situation where there is an actual consequence for failure (and gas AirSoft guns STING like you wouldn’t believe), then that’s a Bad Sign.
Force-on-force testing is a wonderful thing. Failing a force-on-force test doesn’t automatically mean the technique is bad—nothing is foolproof, and you may well be doing it wrong. However, if someone can easily shoot the instructor repeatedly, well…
….quit listening to that instructor. He’s going to get you killed.
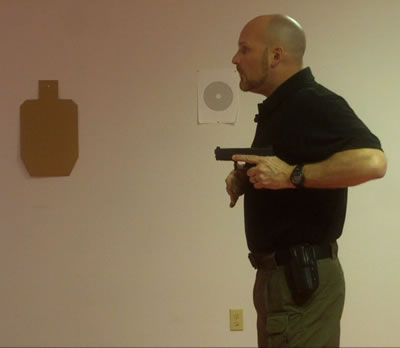
I was talking with a friend of mine the other day. My friend is a USPSA Chief Range Officer, and over the course of her time as an RO and CRO, she has run literally thousands of shooters through various courses of fire.
She said something that I agree with completely: “Within a few seconds of them drawing their gun from the holster at Make Ready [when the competitor can draw their firearm, make ready, and prepare to start the course of fire], I already know how good they are going to be–and how safe they are going to be.”
Pretty much every experienced range officer in the action shooting sports will say the same things—the minute you touch your firearm, we can see what sort of gun handling safety habits you practice.
Or don’t practice, as sometimes is the case.Hence, this video: the third in the series of Fundamental Gun Handling Skills, this time on SAFE GUN HANDLING.
I originally made myself a couple of notes about the four main things I wanted people to work on for safe gun handling, got in front of the camera, took some video, went home and edited it–and realized the video was almost 20 minutes long. The more I talked, the more I remembered safety issues and EXCUSES I’ve heard over time from people attempting to justify their unsafe actions.
“This is the way I was trained!”
“It isn’t loaded!”
“It wasn’t really pointing at you!”
“I haven’t had any trouble doing that before.”
“No one ever said it was a problem!”
“My finger was off the trigger!”
…and of course my all-time favorite (and yes, I’ve actually heard this one) “I know what I’m doing, this is REAL self-defense training.”
I don’t know about you, but I consider self-defense training “real” when it also teaches me to NOT SHOOT MYSELF.
So I went back to the studio and tried to just pick the main things, the most important things, the things that will hopefully make the MOST difference in terms of safety. And I managed to get the video down to 10 minutes. It still is pretty long for a YouTube video with some guy just standing there talking at you, so I’m pretty sure most of the people who really need to watch it (and take it to heart) probably won’t do so.
But I tried. So here it is. It isn’t everything you should do, there are plenty of other things I could have said, plenty of other habits of good practice I could have included—but I tried.
Make safe gun handling something you do automatically, all the time, without fail. Make it such a habit that if you do something UNsafe, it will feel strange and wrong, and you won’t like doing it. That way, under stress when your brain isn’t working right—you WON’T do it wrong.
There is so much more we could say. But if nothing else, if people would just keep control of the gun with their strong hand, keep their finger pinned to the frame/slide when not actively shooting, and control their muzzle, that would be GREAT.
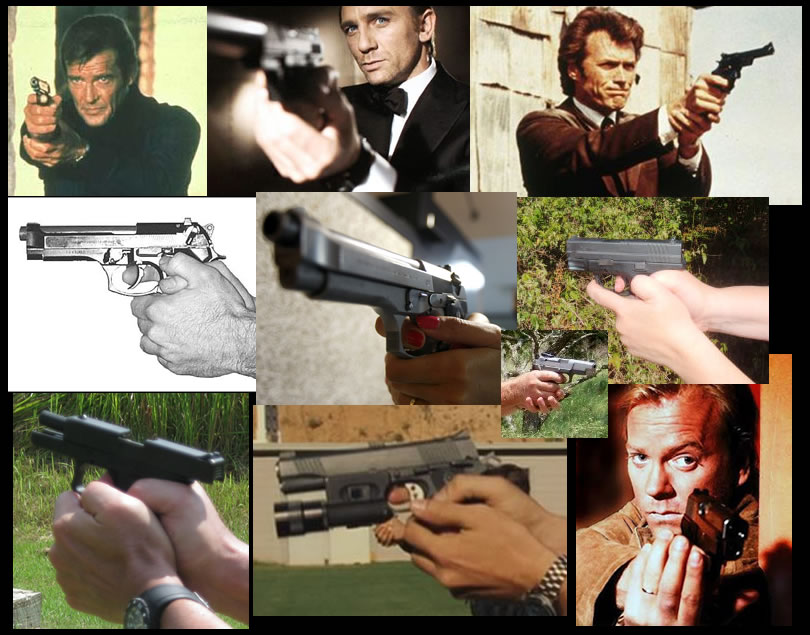
One of the things I tend to see quite often from people who “already know how to shoot” is a poor grip. Whether that grip was “learned” from movies, TV, a family member, “this really good shooter I know” or whatever I have no idea, but often it is simply a bad grip.
Having a good grip is very important in terms of shooting well. Sure, it is possible to be both accurate and fast with a poor grip. However, it is highly UNLIKELY, and chances are you simply can’t do it. And more importantly, you won’t be accurate when it is incredibly important such as when you are using a firearm to save your life.
The problem is, it seems so simple that many people don’t think about it–which means they simply do it wrong. Now, there are a number of versions of a “correct grip,” and while in my video I suggest a specific one, I do talk about how there are several variations on it. As I say, the correct grip for you depends on your hand size, grip strength, firearm choice, and grip dimensions and shape. The grip I suggest in the video can be easily modified based on those variables. (And if you can’t make it work—probably that gun simply isn’t for you. There are physical limits, and if the grip needed to be fast and accurate exceeds them, it simply isn’t going to work out.)
Outside of those variations, there are unfortunately a number of other grip types that are simply very WRONG–so if you are using a teacup grip, a wrist support grip, a grip (on a semi-auto) where your weak-side thumb is wrapped around the back of the gun, or a thumbs-locked-down grip, then I’m afraid that yes, you are doing it wrong.
DON’T GRIP LIKE THIS!
The good side is that you will be able to increase your shooting ability significantly merely by fixing your grip.
I meant to only have this video be a couple of minutes long, but the more I explained the details, I more I kept remembering all the questions, complaints, and “explanations” I’ve heard for other grips over the years, and I wanted to make sure I addressed at least some of those.
Having me just say “do this because I say so!” isn’t really convincing. So, I wanted to talk about WHY a proper grip makes a difference, and why improper grips cause issues. As such, the video ended up rather longer than I originally meant….hopefully it keeps your attention well enough to be useful.
(Note: this video isn’t about your stance. We’ll get to that one later. This one is simply about how you are holding the gun in your hands.)
We’ve decided to start a series of short Fundamental Gun Handling videos on YouTube, with the idea of pointing out some of the most-common errors we see (and their fixes!) with respect to the fundamentals of gun-handling.
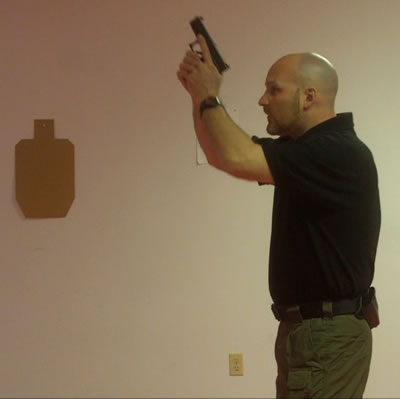
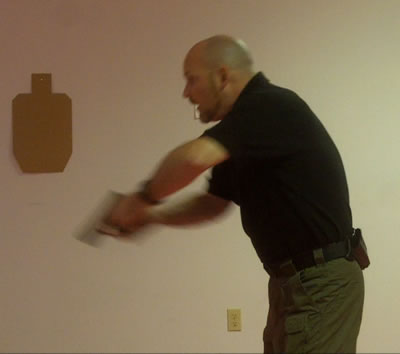
We posted the first video today, and it is about the draw–specifically, how to make sure you aren’t using a fishing draw or a bowling draw. (Go to any range, and you’ll see numerous examples of both of these things. Makes any competent shooter cringe.)
As is probably obvious, I shot this really quickly when I had a free 30 minutes before teaching a class, my voice isn’t working properly, and obviously I had no script and was doing it off the top of my head. [sigh] Hopefully, it still makes sense–and most importantly, I hope that the FIX for bowling and fishing draws is clear.
Don’t go fishing!
No bowling!
It really is simple—snap your wrist up to point the gun at the target immediately after the gun leaves the holster. That’s it. So quit doing bowling draws or fishing draws!
Get that gun pointed at the target right out of the holster!
More videos to come, with hopefully good content on fixing fundamental gun-handling skills.