Stress Training…

I’m a big fan of stress training.  And when I say stress training, I mean a range of various training modes from light stress such as using a timer with people watching, to full-on adrenalized force-on-force with weapons, significant energetic verbal interaction, and additional special effects to simulate reality as close as possible.

Recently, there was a request from someone to actually talk more in depth on this topic, so here’s a brief discussion on the general concept:

Multiple studies over time have clearly shown that stress creates physiological changes in the human body that effect our abilities to perform physical and mental actions.  The level of stress felt by the individual (which is NOT the same thing for all people in the same situation) can occur along a huge range, and thus can create physiological reactions that range from minor to (extremely!) major.

So, the First Statement of stress reactions and training:  Nothing is an absolute.

What happens to a person physiologically depends on the perceived level of threat/stress, which is a function of immediacy, proximity, experience, and understanding of the situation.  It can also be effected by duration of stress, but that isn’t something we normally consider much in terms of citizen self-defense situations, though it IS something that needs to be considered for people whose jobs involve repeated stress events like law enforcement, military (on deployment), fire fighters, and some other first responders.  (Stress is cumulative and seems to be more geometric than additive.  In other words, stress over time ramps up quickly.)

Second Statement of stress reactions and training:  The most common physiological reactions felt by people under significant amounts of stress/adrenaline are, in no particular order:  tunnel vision, auditory exclusion, time dilation, increased speed and strength, and a decrease of physical control and precision.  (There are more, but those are the major ones.)  After the event has occurred, the “crash” that accompanies the stress response cycle (not only the adrenalized feeling that still occurs afterward, but the body’s reaction to that adrenaline going away) sometimes includes inability to speak coherently, tendency to babble, inability to remember time sequences and events in a precise and correct manner, shaking, nausea, light-headedness, and shock.

An example of these first two statements in use:  The first time a person is involved in a potential life-threatening self-defense situation (and realizes it), the stress is huge and crushing, and the person experiences significant tunnel vision, doesn’t hear anything around him, feels like he’s mired in mud and everything moves incredibly slowly, and his ability to do things seems stunted because he’s incredibly clumsy.  Afterward, he is shaking and can’t stop himself from talking, and his recollection of the details of what happened and in what order are significantly different from a video recording of the event.  He feels weak and sick to his stomach.

He then decides that this will never happen to him again.  He takes training that includes stress-training and force-on-force.

He then gets into another life-threatening situation—but this time it is a car crash.  The circumstances do not match what he has been training for.  His stress level is significantly high, but the practice he has done has made him better at dealing with the physiological effects.  He still feels them, but not quite to the same extent, and performs better (with a better ability to think and respond effectively) based on his experiences with stress.

Later in his life, he experiences another life-threatening self-defense situation.  (He’s not having a good year.)  Several things are in his favor:  He recognizes the situational type of attack, and has trained for it, therefore his stress level is significantly lower.   In addition, his training has prepared him for acting during high stress events.  As such, not only does he have less tunnel vision, auditory exclusion, and self-discipline issues (the physiological reactions are significantly less serious), but his ability to handle said issues and react effectively is significantly better.

Afterward, he still feels some of the effects of the adrenal crash (though it is much less since he was less stressed than the first time this happened to him) however his ability to mitigate the affects is much better, AND his training tells him to shut up and not babble things that may not be correct.

For any person, the amount of stress that occurs is based on the perceived level of the situation—so the same situation may cause extremely different reactions in two different people with two different levels of training and experience.  Reactions to stress are NOT absolutes, so if someone says “This WILL happen to you, you WON’T be able to do this other thing” then there is a problem, because it doesn’t happen that way.

Sure, if you are untrained, have no experience with stress and violence, and are taken by surprise, the stress levels you will feel will probably be such that your ability to respond will be close to nonexistent.  But we train for a reason—and training both lowers perceived stress, and helps you handle the physiological reactions that occur.

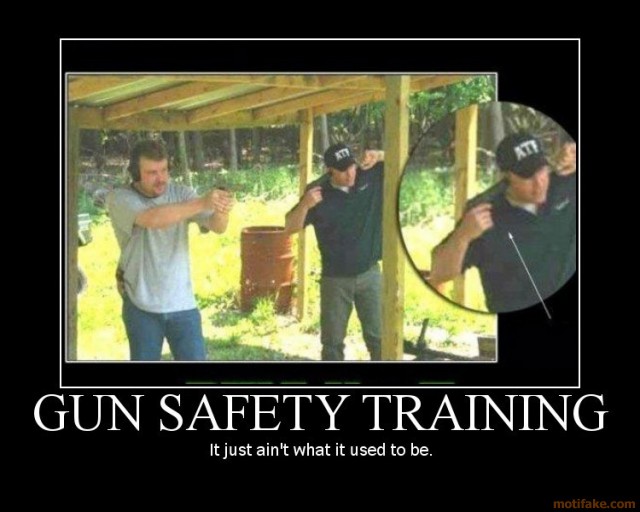
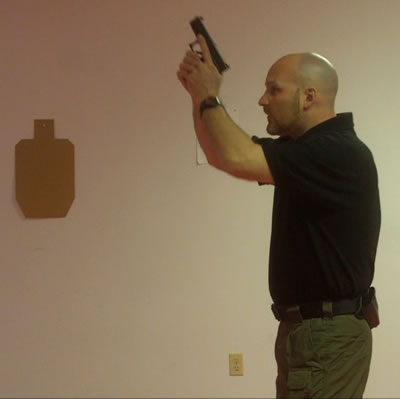
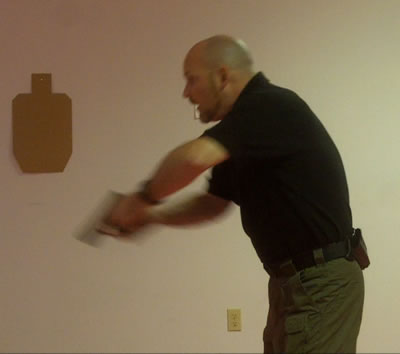
So—sure, under stress you will want to stare at the attacker (or turn your head away completely), bring up your hands (perhaps in front of your face), and not pay attention to anything else.  If you have no training, experience, or practice in dealing with stress, that’s probably exactly what you are going to do. (If you can do that much.)  WITH practice, you CAN handle a firearm, aim using the sights, maintain situational awareness, move, and react effectively.  Among other things.

Violence, stress, and physical reactions are not absolutes—and they aren’t simple things.   The good thing is that you don’t need to be able to diagram the neural pathway and list the neurotransmitters engaged when stress stimulates the the hippocampus and amygdala…  (which again, is a simplification of what occurs in your brain and body)  …you can simply get good realistic training that increases your ability to handle stress, and then get training that realistically simulates self-defense situations to enable you to understand them—which will lower your perceived stress in self-defense situations.  The combination of those things WILL make you more capable of doing what you need to do to keep yourself and your loved ones safe.

More to come in a later article regarding specifics of what you can do for “stress inoculation,” which is a commonly used term describing training that 1) increases your ability to control your body and deal with the reactions caused by stress in general, and 2) reduces perceived stress during altercations by adding experience with those situations.


Some additional reading, if you want more.  The following is more phrased to apply to unarmed self-defense, but really is about all self-defense:

Marc MacYoung’s No Nonsense Self-Defense Page
(Warning:  Marc has a unique writing style.)

Fundamental Gun Handling Videos: Part IV, The Reload

There are a number of different ways to perform a reload, and a number of different reload “types” that people perform.  Administrative reloads, speed reloads, emergency reloads, tactical reloads, reload-with-retention, slide-closed emergency reloads…

…in the end, they are all about getting ammo back in the gun and being able to shoot it again as fast as possible.  (Well, except for the admin reload. We are going to ignore that, however.)

There are already a number of videos out there that show how to perform various types of reloads, and we don’t need another one.  Instead, as is normal in this series, this video will talk about some of the most common errors people commit in their reloads, and show you how to fix them.

Don’t forget to keep your finger pinned to the frame or slide while performing your reload, and don’t put it back into the trigger guard until you have the gun pointing on target and you plan to fire.  Even if you screw everything else up, get the safety part correct.

Oh–and don’t reload sideways.  STAHP.

DON'T DO THIS!

DON’T DO THIS!

Posts in this series:

Fundamental Gun Handling Videos: Part III, Safe Gun Handling

I was talking with a friend of mine the other day.  My friend is a USPSA Chief Range Officer, and over the course of her time as an RO and CRO, she has run literally thousands of shooters through various courses of fire.

She said something that I agree with completely:  “Within a few seconds of them drawing their gun from the holster at Make Ready [when the competitor can draw their firearm, make ready, and prepare to start the course of fire], I already know how good they are going to be–and how safe they are going to be.”

Pretty much every experienced range officer in the action shooting sports will say the same things—the minute you touch your firearm, we can see what sort of gun handling safety habits you practice.

Or don’t practice, as sometimes is the case.gun-safety-training-stupid-gun-safety-training-demotivational-poster-1266003554Hence, this video:  the third in the series of Fundamental Gun Handling Skills, this time on SAFE GUN HANDLING.

I originally made myself a couple of notes about the four main things I wanted people to work on for safe gun handling, got in front of the camera, took some video, went home and edited it–and realized the video was almost 20 minutes long.  The more I talked, the more I remembered safety issues and EXCUSES I’ve heard over time from people attempting to justify their unsafe actions.

  • “This is the way I was trained!”
  • “It isn’t loaded!”
  • “It wasn’t really pointing at you!”
  • “I haven’t had any trouble doing that before.”
  • “No one ever said it was a problem!”
  • “My finger was off the trigger!”

…and of course my all-time favorite (and yes, I’ve actually heard this one) “I know what I’m doing, this is REAL self-defense training.”

I don’t know about you, but I consider self-defense training “real” when it also teaches me to NOT SHOOT MYSELF.

So I went back to the studio and tried to just pick the main things, the most important things, the things that will hopefully make the MOST difference in terms of safety.  And I managed to get the video down to 10 minutes.  It still is pretty long for a YouTube video with some guy just standing there talking at you, so I’m pretty sure most of the people who really need to watch it (and take it to heart) probably won’t do so.

But I tried.  So here it is.  It isn’t everything you should do, there are plenty of other things I could have said, plenty of other habits of good practice I could have included—but I tried.

Make safe gun handling something you do automatically, all the time, without fail.  Make it such a habit that if you do something UNsafe, it will feel strange and wrong, and you won’t like doing it.  That way, under stress when your brain isn’t working right—you WON’T do it wrong.


There is so much more we could say.  But if nothing else, if people would just keep control of the gun with their strong hand, keep their finger pinned to the frame/slide when not actively shooting, and control their muzzle, that would be GREAT.

ALL THE TIME.

Posts in this series:

Fundamental Gun Handling Videos: Part II, The Grip

One of the things I tend to see quite often from people who “already know how to shoot” is a poor grip.  Whether that grip was “learned” from movies, TV, a family member, “this really good shooter I know” or whatever I have no idea, but often it is simply a bad grip.

Having a good grip is very important in terms of shooting well.  Sure, it is possible to be both accurate and fast with a poor grip.  However, it is highly UNLIKELY, and chances are you simply can’t do it.  And more importantly, you won’t be accurate when it is incredibly important such as when you are using a firearm to save your life.

The problem is, it seems so simple that many people don’t think about it–which means they simply do it wrong.  Now, there are a number of versions of a “correct grip,” and while in my video I suggest a specific one, I do talk about how there are several variations on it. As I say, the correct grip for you depends on your hand size, grip strength, firearm choice, and grip dimensions and shape.  The grip I suggest in the video can be easily modified based on those variables.  (And if you can’t make it work—probably that gun simply isn’t for you.  There are physical limits, and if the grip needed to be fast and accurate exceeds them, it simply isn’t going to work out.)

Outside of those variations, there are unfortunately a number of other grip types that are simply very WRONG–so if you are using a teacup grip, a wrist support grip, a grip (on a semi-auto) where your weak-side thumb is wrapped around the back of the gun, or a thumbs-locked-down grip, then I’m afraid that yes, you are doing it wrong.

DON'T GRIP LIKE THIS!

DON’T GRIP LIKE THIS!

The good side is that you will be able to increase your shooting ability significantly merely by fixing your grip.

 I meant to only have this video be a couple of minutes long, but the more I explained the details, I more I kept remembering all the questions, complaints, and “explanations” I’ve heard for other grips over the years, and I wanted to make sure I addressed at least some of those.

Having me just say “do this because I say so!” isn’t really convincing.  So, I wanted to talk about WHY a proper grip makes a difference, and why improper grips cause issues.  As such, the video ended up rather longer than I originally meant….hopefully it keeps your attention well enough to be useful.

(Note:  this video isn’t about your stance.  We’ll get to that one later.  This one is simply about how you are holding the gun in your hands.)

Posts in this series:

Fundamental Gun Handling Videos: Part I, The Draw

We’ve decided to start a series of short Fundamental Gun Handling videos on YouTube, with the idea of pointing out some of the most-common errors we see (and their fixes!) with respect to the fundamentals of gun-handling.

We posted the first video today, and it is about the draw–specifically, how to make sure you aren’t using a fishing draw or a bowling draw.  (Go to any range, and you’ll see numerous examples of both of these things.  Makes any competent shooter cringe.)

As is probably obvious, I shot this really quickly when I had a free 30 minutes before teaching a class, my voice isn’t working properly, and obviously I had no script and was doing it off the top of my head.  [sigh]  Hopefully, it still makes sense–and most importantly, I hope that the FIX for bowling and fishing draws is clear.

Don't go fishing!

Don’t go fishing!

No bowling!

No bowling!

It really is simple—snap your wrist up to point the gun at the target immediately after the gun leaves the holster.  That’s it.  So quit doing bowling draws or fishing draws!

Get that gun pointed at the target right out of the holster!

Get that gun pointed at the target right out of the holster!

More videos to come, with hopefully good content on fixing fundamental gun-handling skills.

Posts in this series:

Changes in PRT Classes, and the 2015 Schedule…

Well, it’s a new year, so of course we’ve got some new things going at Precision Response Training

First off, some good news: For the past couple of years there has been a lot of requests for more short seminars–so that’s what we are going to do.  We’ve started by scheduling three in the first half of the year, and we are planning on at least two more for the remainder.  The topics for the first ones are already set, but while we already have some ideas in mind for the last two, we will entertain suggestions–so if there is anything in particular you want to do, let us know!  (Seminar dates:  Mar 28, Apr 25, May 09.)

Second, as we’ve been teaching the Handgun Techniques and Shooting Skills courses, we’ve found that not only can they be taught at the same time, but also that the people who have signed up for fundamentals analysis (Shooting Skills) could have significantly benefited from some dryfire instruction on technique prior to the live fire section of the class like what happens in the HT course.  In many cases, we see that with a short amount of dryfire work prior to the range time, we could have shortened the time for the improvement process on specific fundamentals.   So—the Handgun Technique course and the Shooting Skills courses have been combined into a single 1.5 day course.  The initial evening will be dryfire in the classroom to work on specifics of fundamentals, and the next day will be on the range the entire time.  (This hasn’t changed for the HT students, but it does add some good dryfire work for the SS students.)

Third, we have put up the schedule of classes for PRT courses through May.  While we’d LIKE to be able to offer a CCW State course every month, we have a limited amount of time and we’ve decided that our other courses are more important–because you can find CCW courses all over the place (and if you can’t take mine, among others I recommend Chris Zeeb at Nebraska CCW Training) but you can’t find our Handgun Technique/Shooting Skills, CCW Lifestyle, or Defensive Tactics/CQT courses anywhere else.  (Though I have been amused at how several other trainers locally have added practical CCW courses scenario training and other aspects of the CCW lifestyle since I started teaching my course. And suddenly CQB-with-combatives have appeared, too. Hm.)

Lastly (here’s the bad news) due to changes in available resources and general costs, I’ve had to raise a few of my class fees.  Seminars are now $40, HT/SS is now $145, and the CCW Lifestyle and Introduction to Handgun courses are now $95.  For those last two, I kept them ridiculously cheap as long as I could (truthfully, $85 is a stupid amount for me to charge for a 1.5 day course in which I have to buy required student packets plus use a huge amount of equipment plus supply ammunition for all students) because I feel that people need VERY BADLY to take those classes.  And I haven’t changed the cost much–only $10 more.  But that SHOULD help me continue to be able to offer those classes because I’m not losing quite so much money on them.

So, get yourselves to the PRT Schedule/Registration page, and sign up for some classes!

Schedule for Jan 2015 – May 2015:

  • Feb 07:  CCW Lifestyle
  • Feb 28:  CCW State Course
  • Mar 13-14:  Introduction to Handguns
  • Mar 28:  Pistol Skills Seminar
  • Apr 10-11:  Handgun Techniques/Shooting Skills
  • Apr 25:  Competition Seminar
  • May 09:  Tactics Seminar
  • May 30:  CCW State Course

(I’ll be adding more details about the seminars later this week…)

Learning to shoot, part IIB….how to PRACTICE! (live-fire section)

Keeping on with the thread of learning how to shoot, let’s talk about live fire.  We’ve discussed the general process of learning, we’ve talked about the effectiveness of dryfire practice in general—so how do you make sure that your live fire practice actually makes you better?

First:  HAVE A PLAN.

Hopefully, you’ve already done enough dryfire practice to both know your current strengths and weaknesses, and even better, your limits with regard to various skills.  If you’ve been practicing, then you will have made gains in your dryfire skills that need to be tested in live fire.

Which means that you should know what skills you should be testing in this range trip.  Prior to going to the range, check your dryfire practice regimen and look at what needs to be tested in live fire.  I generally TRY to work on no more than three skills per range trip–because I tend to attempt to verify my dryfire practice skill level in isolated drills, then work on combining those skills with others to make sure the skills are integrated correctly.  (In other words, that I can do it on demand no matter the circumstances, as opposed to only when I’m set and ready to perform solely that skill.)

Which means that I’ve already got quite a practice session set up.  While there is occasionally some value in a marathon 1000-round all-day practice session, MOST people hit their concentration limit at 2-3 hours.  (Some sooner than that.)  If you can’t concentrate, focus, and control your motor skills, you are just making loud noises for fun.  Nothing wrong with that—but it doesn’t help, and may actually cause you to practice poor technique.

So:  Plan to test a limited number of skills first in isolation, then in combination.

Second:  ALWAYS PRACTICE ACCURACY.

USPSA Grandmaster Manny Bragg has a dot drill that he uses to start every range practice, which requires nothing but the ability to draw and repeatedly make accurate shots on a single target within a par time.  It isn’t an incredibly difficult drill, but it does require that the shooter demonstrate the ability to have solid sight alignment and manage the trigger correctly.  He keeps shooting it until he passes the drill—whereupon he goes and works on whatever he had planned for his range practice that day.

His contention, which I completely agree with, is this:  If he can’t be accurate enough to hit 3″ circles at 10 yards under a slight time pressure, then he isn’t shooting well enough to practice anything else live.  (After all, anything NON-shooting can be done in dryfire, and if you are shooting, you have to be accurate.)

He’s had at least one occasion where he never got to his actual practice plan—he kept not being able to keep his concentration, would blow the drill, and finally just stopped and went home.

If you can’t shoot accurately, then not much else matters in live fire practice.

This doesn’t mean that you can’t shoot drills at 3 yards with only a target focus, or anything similar—it simply means that at the start of your practice, if you can’t manage the concentration and discipline necessary for solid accurate shooting then it isn’t a day where anything more complicated will be improved.

Third:  DON’T DRILL IT INTO THE GROUND.

Performing 1000 reps of a particular drill won’t actually make you better, if you do them all in a row.  For most people, by about rep 10 their concentration will start to wander (if they have done all the reps in a row in the same fashion) and it simply won’t help.

Yes, to be skilled you’ll have to practice a drill 10,000 times.  But like dryfire practice, it’ll work a lot better if you do that in chunks of 10 reps, interspersed with other things.  Do 10 good, solid, disciplined reps–then do a different drill.  Then come back, and perhaps do 10 more, in a slightly different fashion.  Same skill, but different enough situation that you still have to concentrate fully on it.  Work on another drill for awhile, take a break, then do your original drill for 10 more reps.

You’ll see a LOT more skill gain doing it that way compared to doing 30 reps in a row.  And you’ll be more likely to retain that skill gain.

Fourth:  VERIFY YOUR SKILLS.

In general, dryfire is where you push your limits.  Live fire is where you verify your skills.  You know you aren’t going to draw as fast as you possibly ever can in live fire, because if you screw up the gun will go flipping downrange.  Instead, you push yourself in dryfire, and then in live fire find what you can do consistently and accurately.

Part of that is of course working skills in an isolated fashion, for example working on your ability to draw to an upper A-zone hit (the “ocular window” area, for those who don’t USPSA) in less than 1.5 seconds.  Or working a 7-yard A-zone hit, reload, to a second A-zone hit in less than 2 seconds.   That’s isolated, specific skills.  (Perhaps your times are better.  Or worse.  It depends on what your skill level is.)

But you also need to work on integrating those skills with others–and practicing your recoil control while switching skills is something you can only do in live fire.  So don’t neglect it!

Practice a draw-to-one-shot drill.  Then a 1-reload-1 drill.  Then a draw-to-one-shot drill while taking a step.  Then a 1-reload-1 drill where you transition from one target to another while reloading.  Then practice a stepping draw-to-one-shot, reload-while-transitioning to a second target, one shot drill.  Lastly some more reps of a draw/shot drill, a 1-reload-1 drill, and then end that sequence with a basic draw/shot/reload/shot drill on the same target—but at 15 yards instead of 7 yards.

That’s 8 drills, two skills, with a combination of isolation and integrative practice.

The skill stays the same.  But the differences require you to keep concentrating, and sequencing the drills mean that you have to keep yourself honest about your recoil control and ability to handle the firearm.

Pistol-training.com (Todd Louis Green) created an outstanding general purpose target awhile back, available from National Target.  If you don’t have much time or equipment, you can EASILY get in a solid 200-round practice session using only one target.  Obviously, multiple targets of the type you are most likely to shoot (IDPA, IPSC, silhouette, bullseye, whatever!) at different ranges and angles are best—but it is also true that occasionally shooting at something different is a good thing, and the P-T.com target gives you LOTS to work with.

When working on getting better, remember:  if you can’t work the gun, then you’ll never have a chance to shoot.  If when you shoot you can’t hit anything, it won’t help.  So in terms of skills, those two are the most important. If those are solid, work on keeping those going while doing other things like transitioning, shooting one-handed, weak-handed, turning, on moving targets, while moving backward….the possibilities are endless.

Have a plan, keep your accuracy high, drill intelligently, and verify that your dryfire practice is working.

Other posts in this series:

SouthNarc ECQC, realism, and effective practice…

A several weekends back I attended SouthNarc’s ECQC course, held over in Council Bluffs, IA.

Obligatory plug:  If you are interested in close-quarters practice, solid realistic technique, purposeful directed instruction, and some serious force-on-force practice, you should take ECQC from Craig Douglas.  I could go on, but pretty much everyone who has taken his class has raved about it so you don’t need another AAR saying the same things.  So, short form:  It’s a really good class.  If close-quarters is something you are interested in, take it.

So, here’s the real reason for this post:  How can you get practice to be realistic without sending people to the hospital?  How can people get effective practice in a realistic fashion, when attempting to learn about weapons?

In the class, after one particular evolution in which I shot a couple of guys and then ended up being landed on by two attackers, Craig asked me:  “So, why did you draw your gun at [point A] in the scenario?  You didn’t point it at the guy, but you drew it.  Why didn’t you just hit him?  You’ve got all that Hapkido experience—why the gun?  Surely you know enough hand-to-hand self-defense?”

At the time, demonstrating that adrenaline and stress indeed makes fools of all us, I blathered out something about the situation, and how I didn’t want to close with a guy bigger than I am because “all that experience” means that I know one good hit can finish everything, and there were two guys—but thinking upon it later, that isn’t REALLY why I didn’t do it.  What I said was true—but wasn’t the actual reason.  I just couldn’t articulate it at the time.

I was in evolutions in which I could have used physical striking techniques seven different times during that class.  I almost never did, however, even though I certainly had plenty of opportunities.  Why not?

For two reasons:

1) People were wearing cups, and FIST helmets.  That’s it for protection.  And I had NO idea of their level of training (or ability to take falls).  As such, I could either perform techniques (non-breaking and non-throwing ones) that actually hurt but didn’t damage such as kicks/knees to the thigh or strikes to the solar plexus/abdomen, or strikes to the armored areas (head and groin)—or I could throw those same techniques but pull them so they were on target, but didn’t do damage.  (Technically, I could hit any point in between those two extremes, but the effect on my training partners would be either one or the other.)

I didn’t want to hurt my training partners, and I wasn’t sure of the interaction level limits—I’ve been in minimal-padding-but-full-contact sparring sessions that hurt a lot before, but I didn’t think that everyone there had signed up for that sort of thing.

So that pretty much left pulling my techniques—performing them, but pulling them so the person struck knew they’d been hit, but weren’t actually damaged.  However, the second reason would make that ineffective…

2) People weren’t reacting realistically.  I saw people get louder, mouthier, and then attack in the face of a pointed gun numerous times–and I expect that’s not how reality actually goes, for the most part.  Considering also that people did not react to being shot (which does happen in reality sometimes), lighting someone up with 6 rounds then not having to worry about them anymore WASN’T an option.  Which ALSO meant that people taking strikes were pretty much ignoring them.

So—why didn’t I simply flatten the first guy in my evolution?  Because all that would have happened would be that either I would have hurt the guy, or he’d have ignored my strikes and since I would have closed the distance it would immediately have meant an entangled situation with someone bigger than I was—who had a friend coming along soon.  And my gun would have been in my holster, while I was entangled.

And if you can’t hammer on someone in an entangled situation, you have to grapple your way out.  As people who’ve tried it know, handling two people larger than you in a grappling-only situation is pretty much a solidly losing proposition.

So how do you have realistic practice at this?  How can you practice realistic weapons work ALONG with realistic empty-hand work in scenario training?

  1. Have everyone wear armor so they can strike full contact?  People will just shrug off the impact since they weren’t hurt, and move on. That doesn’t really fix anything other than people will be able to actually strike with power.
  2. Have everyone just suck it up and take the bruises?  There aren’t going to be many people able to do that training for very long—and many people won’t even try.  Like I said, I did seven of these events in the ECQC class—I’m pretty sure that given full-contact with no padding, after the second or third event I’d have been unable to continue in any useful fashion.  I’m good, but when two people land on you, if they can start whaling away you are in trouble.
  3. Have people not wear padding, and tell them they all need to react “realistically” to good strikes?  …have you ever tried to do that?  It is really hard to do, particularly if you have a group of people who have NOT specialized in unarmed combat practice. Most people simply do not know what “realistic” looks like.  (And most males vastly overestimate their ability to take hits.)

I should note here that I’m not bagging on SouthNarc’s class—-I really appreciated the way the class was designed and taught.  His class was really, really good and I say that as someone who has specialized in teaching for quite a few years, which means I’m REALLY critical of instructors and their teaching methodologies.  (I’m also happy to see that what I’ve been teaching in my CQ courses is solidly in accord with the concepts, techniques, and practice of one of the acknowledged experts in the field.)

Each evolution really could be thought of as a series of interactions, not just one event:

  • First, the verbal/nonverbal interaction, movement, and positioning,
  • Second, the initial assault/attack (by whoever—sometimes it was intelligent for the defender to strike first) and the consequent results of whether or not the weapon could be deployed usefully due to positioning,
  • Third, the entanglement that inevitably occurs if the situation continues as the attackers WILL close the distance (you can’t escape or get away) and the defender’s attempts to keep their weapon or render it nonfunctional by anyone else along with keeping themselves alive.

Each evolution is going to get to point three, almost invariably.  That isn’t a failure of points one and two—it is just going to happen because the damage is going to be ignored.  Points one and two can still be discussed and critiqued on their own.  But you ARE going to reach point three.

In my case, if I HAD gone physical with my attacker early on during point 1 (moving myself into point 2), we simply would have reached point 3 much sooner because he would have ignored my strikes and simply grabbed me–and I knew it, and wanted to maintain my distance and weapon advantage.

So how do you fix the “realism” part so that people actually use BOTH their weapons techniques AND their empty-hand practice in a realistic fashion?  Or at least get around this particular realism problem?

In a general-enrollment class, I don’t think you can.  In some specialized classes with people who understand those parts due to experience, perhaps.  But other than that, I think to make it work you would have to have dedicated attackers wearing armor who know how to react realistically—and that just isn’t going to happen in a majority of classes.

So: Craig—there WAS a reason why I didn’t just hit that guy when we did the two-on-one when I was the defender.  I didn’t want to accidentally hurt him (I really like sweeping the leg and low kicks, and that probably would have been bad) and I didn’t want to pull my punches just so I could immediately be grabbed and tackled, either.

In real life….?  I don’t know.  I’ve not been in that situation.  I’d like to THINK that I’d have been able to leave the situation prior to that point, but if not—dropping the first guy HARD before the second guy came up would have been a solid option, and for the most part, yes, I do think I am sufficiently trained to manage that.

Even if he was bigger than me.  🙂

Learning to shoot, part IIA….how to PRACTICE! (dry-fire section)

So, you’ve got the fundamentals down pretty well, you’ve got the basics of a safe, efficient draw and reload, you’ve practiced transitions, worked on your splits, done some practice with effective movement and a bit of shooting on the move…

…how do you get better without paying for more training?  In other words, how can you set up dry and live fire drills to give you the maximum improvement for your time?

Well, first you need to figure out what exactly you need to improve.  What are your goals?  Better competition shooting?  Better self-defense techniques?  What exactly are you trying to learn?  Creating a list of specific skills you wish to improve will help you organize your practice in an efficient fashion.

Here are a few skills that should be on everyone’s list, no matter how skilled they think they are–and these skills should STAY on your list, no matter how much better at them you get:

  1. Drawing to a close, high-percentage target
  2. Drawing to a distant, low-percentage target
  3. Emergency (slide-lock) reload
  4. Speed reload
  5. Transitions
  6. Trigger control:  freestyle, SHO, WHO

(These are NOT in order of importance, by the way.)  Now, obviously there are other skills that should be added, depending on what your goals are for practice.  However, no matter what your goals, you should be practicing the above skills.

So let’s talk about how to practice…

Brief discussion about practice theory, regarding the best way to ingrain habits:

  • Frequent short practices cause more effective retention than longer practices that occur less often.
  • Imperfect practice does not improve skill—and it may actually worsen the skill.
  • And yet, if you don’t push yourself, you will not get better nearly as quickly (and your “best” level will be lower than it should be).
  • Focusing consciously on the skill you are practicing will increase skill retention.
  • It is extremely difficult to consciously focus on a particular skill for very long.

For most effective results, a combination of dry fire and live fire practice should be done—in particular, dry fire practice on a continuing, regular schedule (multiple times per week) supplemented with live fire practice.

The goal of the dry fire practice is to ingrain proper technique, and push yourself.  The purpose of the live fire practice is to test your skill, monitor for dry fire practice errors or issues, and practice usage of those skills.  (Yes, you also want to push yourself in live fire—but pushing yourself too hard results in unsafe practice, and shooting yourself is not a good way to increase skill.)

Ben Stoeger has an interesting comment in his video Training to Win, discussing one of the shooters:

“He saw something in his technique that he needs to change.  So he needs to take that back home and dryfire and then he’ll be able to make that change.  You can’t really change anything out on the range. You only have time to fire maybe a couple hundred rounds, maybe you can only make it out once a week--all the repetition has to be done at home, he has to do the dryfire.”  [Emphasis added.]

And he’s got a point.  Unless you get to the range 3-4 times a week, AND have plenty of ammo, you simply aren’t going to get in that many reps of any particular skill drill.   Compared to what you can do with dryfire, live range work really should be for testing skills, and practicing skill chains.

At home in dryfire is where you ingrain those basic physical skills.  That’s where you do the reps to make your movements smooth, fast, and precise.  That’s where you work to make the changes, and do them enough times to make them automatic.

And only THEN do you go to the range to test what you’ve done.  For most people, your capacity to learn physical skills during dryfire is MUCH higher than your capacity to learn them during live fire.

So how can we optimize our learning in dryfire?  Well, first off—have the self-discipline to dryfire every day.  No, you don’t have to set aside an hour every day–even 5 minutes can count.  Try for three times a week of at least 30 minutes, and at least 5 minutes a day the rest of the week.

What do you do for that 5 minute practice?  Wall Drill. Freestyle, SHO, and WHO. (Strong-hand-only and weak-hand-only.) Don’t even need to have your holster or any other gear on, just need the gun, don’t even need to have a magazine in it. 10 reps freestyle, 10 SHO, 10 WHO. Then do it again (10/10/10) but this time, practice bringing up the gun from a low extended ready position. Then do it one last time (10/10/10) but this time, practice extending it out from a compressed center ready position. Whole thing gives you 30 reps of each shooting style, and 90 as-perfect-as-you-can-make-them trigger presses. Takes under 5 minutes.

And it’ll make a huge difference in your shooting, all by itself—BUT you have to concentrate on being perfect for the entire time. Don’t just do the reps to get them over with. Concentrate on what you are doing. Focus hard on that front sight. Watch what it does when the hammer/striker falls. Know what the sights did when the gun went click and afterward. 90 reps total.

Does this get boring?  Only if you let it.  You need to have the self-discipline not to slack off and blow off practice in the first place–but ALSO to make sure you pay attention and focus for that five minutes of reps.  If you are having trouble focusing, strap on a holster and do the wall drill by drawing from the holster, instead.  (Freestyle, SHO, and draw-transition-to-WHO.)   If you have time, periodically switch from holstered to extended low to compressed ready start positions.  Work that trigger press.

Okay, how about the rest of the time–those 30+ minutes of practice?

That depends on your goals, and how advanced you are at your skills.  (In particular, how efficient your movement already is, and how automatic your basic skills are.)  In general, there are roughly three levels of dryfire practice:  basic skills, chained skills, and multitasking.  And most people should NOT work much on chaining or multitasking until their basic skills are solid.

So let’s talk about how to practice a particular basic skill.  Basic practice progression:

  1. Practice it perfectly without time reference
  2. Practice it slightly slower than your normal best speed
  3. Practice it at your best speed
  4. Practice it slightly faster than your best speed
  5. Practice it perfectly without time reference

Let’s say a person’s normal “par time” on a draw from a holster to an A-zone hit at 7 yards is 1.5 seconds.  This means that about 85-90% of the time, that person gets the draw finished with a good sight picture and prepped trigger in 1.5 seconds from an audible start signal.  (The other 10-15% of the time, there is a fumbled grip or a lack of sight focus, or something similar.)  Basically, when the shooter is doing their job, they can complete the skill within the par time consistently.

So, in dryfire, this skill should be practiced something like:

  • 5 reps with a start signal but no par time
  • 10 reps timed at 0.2 above the par time
  • 10 reps timed at the par time
  • 5 reps timed 0.1 below the par time
  • 5 reps timed 0.2 below the par time
  • 5 reps with a start signal but no par time

You get a total of 40 reps, the first 5 and the last 5 of which should be perfect, 20 of which should be solidly correct, and 10 of which are pushing you to be faster.  In general, the above will take somewhere along the lines of 5-10 minutes.

After some practice, you are going to find that you are now hitting 85-90% of the drills at 0.2 below your par time.  So—time to reduce the par time.

So to do this, you need to keep yourself a log of par times for various drills.  Periodically, re-evaluate your par times and adjust them.  (Don’t adjust them each time you practice, unless your par time is too fast and it is making you sloppy.)  Unless something is ridiculously easy, don’t change a par more often than every 6-8 practices.

Now—when doing this, it is incredibly important that you are HONEST with yourself.  Did you really have the correct grip on the gun?  A proper trigger prep?  A clear, focused sight picture?  Just throwing the gun around won’t make you better.  (Matter of fact, unfocused dryfire practice will make you worse pretty quickly.  You’ll feel faster, but you won’t be able to hit anything, and your control will go downhill fast.)

So—pick three different skills and work on them.  That’ll give you about a 30-minute practice time.  Set your par times, log them, and make sure to track what you practice.  Keep a “comments” section in your logbook to add sudden insights, problems that crop up, or questions that you want to think about.  If you suddenly make a change that makes a world of difference, write it down!

Next time you practice, pick three skills—two of which you practiced last time.  (Practicing a skill once, then not getting back to it for another month doesn’t actually help much.)  Keep practicing, and rotate those skills.  Get in reps.  Remember, shorter practices that occur more often are better than long marathon practices that only occur once in awhile.

If you have 15 minutes, do a full drill on one skill, plus the Wall Drill.  Every day you don’t do any other practice, do the Wall Drill.

Now, there are plenty of other things you can do in dryfire practice, but this isn’t a book, so I’m not doing to type them all out.  For those interested in basic skills, Steve Anderson’s first dryfire book is a great way to start.  For those interested in chaining or multitasking, Ben Stoeger’s dryfire books are excellent also.

And after all that, go out to the range and check yourself in live fire.  (Discussion on that will be forthcoming in the next post.)

Other posts in this series:

How do you learn to shoot? (Part I)

Note:  the following is for people interested in pistol shooting—specifically, people interested in self-defense pistol skills.  While elements of this will be true for rifle, shotgun or bullseye pistol also, that isn’t the focus of this writing.

How do you learn to shoot?

I know lots of people have a friend take them out and teach them a bit about guns.  Or learned from their parents or relatives, perhaps have gone hunting, tried a shotgun, a .22 rifle, or an airgun at some point in time.

But how do you actually learn how to shoot a pistol?  Meaning, what do you need to do to build solid safety habits, learn efficient, effective technique, and build significant competency?  Especially if you want to learn for self-defense purposes?  Or competition purposes?  For any actual purpose that involves more than plinking at aluminum cans at 15 feet with a group of friends?

I get asked this question (or variants of it) quite a lot, and so I thought I’d make a comprehensive reply for once.  In particular, a reply in which I can explain WHY you’d want to make certain specific learning events take place.  Because, quite frankly, most people don’t know how to shoot.  Yes, they CAN shoot—but they don’t really know how.  And then they “teach” other people to shoot (badly, and an in unsafe fashion) when they don’t know how unskilled or unsafe they are–and they tend to also have an inflated view of their own competency, which means that the people that they teach have an incorrect view of what “competency” actually means.  (For people who are thinking I’m too harsh, do a search on “first time shooting” or “new shooter” on YouTube, and watch how people are “taught” to shoot.  You’ll then end up thinking I’m not being nearly harsh enough!)

It is NOT hard to become competent with a pistol, from a self-defense or competition perspective.  (I’m going to focus on those two perspectives, as their goals are easy to describe.  If you have any other particular shooting goal, feel free to substitute it.)  However, the path to competency requires that 1) you realize what you don’t know, and 2) you practice.

Most people aren’t exposed to good shooting skills, so #1 doesn’t happen, and movies, media, and popular culture have misled people to believe that #2 isn’t necessary, that shooting is something you can just pick up and be good at immediately, unlike ANY other physical skill you’ve ever tried to learn.

And the path to competency requires also 3) learning efficient, effective technique for skill-building as opposed to making a habit of poor technique.

So how to you learn to shoot?

In the first part of this particular series of posts (this one) I’ll be talking about how you get started—what do you need to get a solid grounding in safety and fundamental technique so that later learning (in the correct mode, without having to break old bad habits) can occur–in other words, how you start on #3.  After that, in the second part, I’ll talk about how you can manage practice even if you don’t have time to get to the range–and how to practice if you can live fire.  The third installment will be about how #1 can always help you get better–and how not paying attention to it will cause your skills to (at best) stagnate, if not actually decline over time.

So yes, I’m taking those three points in reverse order.

I note that you don’t HAVE to do it this way.  I taught myself to shoot a pistol, and it worked out.  That being said, I know for certain that if I had done it the way I’m about to describe, it would have taken me a LOT less time to reach my current level, and I’d have had many less headaches and restarts throughout.

So, how to start:

First?  Take an introduction to handguns class from an NRA instructor.  Yes, there are other possibilities, other instructors, or your friends really MIGHT know what they are talking about when they try to teach you.  And yet—they probably don’t.  And if you don’t already have experience at shooting, you won’t know if a non-NRA instructor is any good or not.

This isn’t to say that the NRA Basic Pistol class is the best, most amazing thing in the world—it isn’t.  However, it IS a comprehensive, informative course that gives you a solid background in firearms, teaches good safety techniques, and the NRA method tends to mean that no matter what class you take (from whatever instructor you have), you’ll still be exposed to all of the information you need, plus get practice in good safety habits.

That being said, it is true that when I teach the NRA Basic Pistol class I add more practice time with inert practice firearms, plus more time with actual firearms.  In addition, I teach the “NRA Way” with respect to shooting technique—and then I teach how it has changed over time and what is currently considered the more effective, efficient way to shoot.  And I hammer on safety practice throughout.

And yet–the basic class (without any extras) is still probably the best place to start for just about anyone who has no shooting experience.  (And even for those people who already “know how to shoot” because their friend taught them in the backyard one weekend.)

Learn how to be safe every time you pick up a firearm.  Ingrain habits such that safety procedures are normal, everyday things, not things you do just when you “think it might be loaded.”  Don’t let yourself treat the firearm differently if you “know it isn’t loaded.”

Once you’ve got that, plus a solid grasp on shooting nomenclature and history, plus some basic practice at standard marksmanship (all of which you get from the NRA Basic Pistol class) next thing is to get yourself a full-size .22 pistol like a Ruger 22/45.  (And keep it—you’ll enjoy having it for the rest of your shooting career/life.)

Practice with the .22 pistol until you can comfortably shoot accurately.  (You’ll do more later, but for right now, learn and ingrain the fundamentals of safe handgun shooting so that you can hit the target consistently.)  A decent goal for this part, at this level, is to be able to consistently hit a 3″ circle at 10 yards.  This practice might only take you a month, if you go every day.  (Unlikely, yes?)  It may take a number of months of practice if you can only go once every two weeks.  How long it takes is up to you.  But no matter what, ALWAYS practice safe gun handling.

Next:  Buy a common, reliable, full-size pistol in 9mm with a decent trigger.  Pick a Glock 17, a S&W M&P, even a Springfield XD.  Full size.  No compact, no subcompact.  No LC9,  LCP, snub-nose revolver, or anything like that.  Full size, common, basic 9mm.

Buy basic range ammo (Winchester White Box, PMC, or Remington bulk ammo), then go to the range and practice the exact same things you were doing with the .22:  safety and fundamentals of shooting to include proper stance, grip, sight picture, and trigger control.  Don’t worry about speed, draws, or reloads yet.  Work on the ability to put hits on target correctly.  The rest will come AFTER you’ve practiced hitting the target.

Get to the point where again, you can consistently get hits on a 3″ circle at 10 yards using proper fundamentals.  Then get it so that you can do it without taking 3 minutes per shot.

Next:  Buy a decent range holster and some magazine pouches.  (Example:  Buy one of the Blade-Tech Revolution Combo Packs—there was a REASON we had you buy a common 9mm full-size pistol, because there are tons of equipment and accessories for those common pistols.) Buy some extra magazines, too, enough so that you have five or six of them.  Then take a class like the PRT Handgun Technique class, that teaches you how to correctly and safely draw from the holster, reload, and shoot at speed.  Learn proper transition technique, work on your trigger control at a faster rate.  Learn how to dryfire these techniques, so you can practice on your own.  Join a local gun club that allows drawing from a holster on the range.  Don’t just “teach yourself how to draw” — actually learn how to do it CORRECTLY.  (Because there is a right way to do it, and many wrong ways to do it.)

Go practice.  Dryfire.  Then live fire.  Dryfire 3 times a week (more, if you like).  Don’t know how to dryfire?  Well, hopefully that mid-level class you just took showed you how to perform good dryfire practice.  Try to live fire at least once every two weeks.  (Even 50 rounds at the range can be a seriously good training time, if you know how to practice.)   Make sure that when you practice, you are continuing to ingrain proper safety.

Buy a shot timer.  Yes, it’ll cost you $100.  It’ll be worth it.  Sure, you can potentially use a free shot timer on your phone, but it just doesn’t work very well.    Use decreasing par times in your dryfire and live fire practice to push yourself.  Don’t ever sacrifice safe technique for speed.

Once you have solid technique in drawing from the holster, reloading, and shooting, try a Steel Challenge match.  All you do is stand there, draw, and shoot with accuracy at speed.  It’ll test your abilities under a little bit of stress, and give you a realistic appreciation of your skill level.  And probably give you a reason to practice more.  Plus, it is just FUN.

After that—well, it depends on HOW good you want to get with a firearm.  And what breadth of skilll you wish to have.  There are of course additional shooting skills classes you can take, along with concealed carry and defensive tactics classes (from all sorts of people).  You can try USPSA action pistol shooting, IDPA competitions, or Multigun.  (If you are in the Omaha area at all, the Eastern Nebraska Gun Club runs USPSA, Steel Challenge, and Multigun matches.  Check out the Eastern Nebraska Practical Shooters site for details.)

No matter what—practice.  Dryfire.  And periodically practice using live fire.  Like every other physical skill, shooting well is perishable.

AFTER all that—then, (since you now have an idea of how to shoot, how YOU shoot, and what you like to shoot) —THEN go ahead and start thinking about what gun you should get for concealed carry, if you plan on doing so.  By now, you should have some solid experience with shooting, and you know your capabilities–which means you should be able to make good choices regarding a CCW firearm.

Short form:

  1. NRA Basic Pistol Class
  2. .22 pistol — go practice until competent at target shooting
  3. 9mm pistol — go practice until competent at target shooting
  4. Get good instruction on correct technique for draws, reloads, transitions, and movement
  5. Practice more, then push yourself with some competition.
  6. Keep practicing.

Then practice some more.  Continue to get good instruction on further shooting topics of interest to you.

In part II of this series, I’ll talk about HOW to get in good practice, both in dryfire and live fire.  (No, going to the range and just blasting out 100 rounds at a full-size silhouette target at 7 yards is not effective practice.)  Later, in part III, I’ll discuss how to make sure you never stop learning, and never get complacent about how much you know.

Thoughts?  Anything missing from this progression of training?

Other posts in this series: